ClassX Virtual Server
We make available ClassX Virtual Server (or Virtual Machine, VM), which allows users and educators to quickly try out ClassX without spending time in installing Linux and other software. With only a few steps, you can create ClassX compatible contents and start ClassX streaming services. To use ClassX VM, please follow the following steps:
Step 1: Download and install on your host computer VirtualBox, a virtual machine software
Step 2: Download our pre-configured virtual desktop image and use it in the virtual server
Step 3: Generate ClassX content and start streaming in the virtual server
ClassX Virtual Server can be downloaded here.
Step 1: Download and install VirtualBox
VirtualBox is machine virtualization software that allows Linux (and other operating systems) to be run on host computers based on Windows, Linux, Macintosh, OpenSolaris, etc. We recommend version 3.2.12, which we have tested thoroughly. You can download VirtualBox here.
Download the version based on your host operating system. For instance, if you have Windows 7 host computer, please select “VirtualBox 3.2.12 for Windows hosts: x86/AMD64”.
Simply follow the installation instructions and accept the default options. During the installation, the set-up will ask for reset of network connection. Simply accept this, unless you are in the middle of file transfer or download.
Step 2: Create ClassX VM using our pre-configured virtual disk
Download our pre-configured virtual desktop ClassX_Ubuntu_10.10.vdi here. The virtual desktop has pre-installed Ubuntu 10.10, Apache HTTP Server V.2, ClassX encoder, ClassX slide synchronizer, and all the necessary software packages. There is no need to install other software to try ClassX.
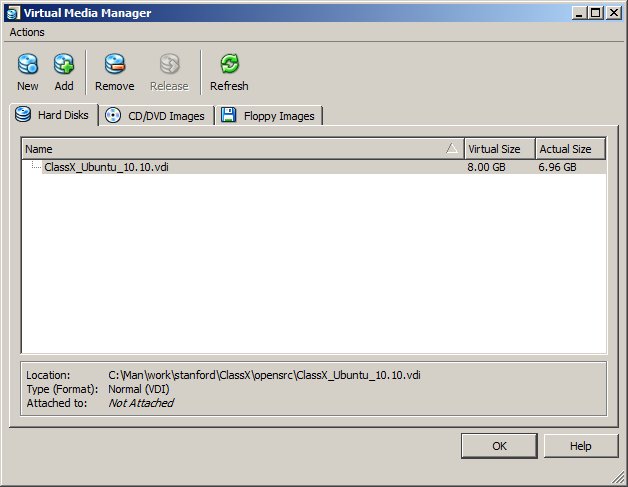
Start VirtualBox. Select File->Virtual Media Manager. Select “Hard Disks” tab. Click “Add” and select ClassX_Ubuntu_10.10.vdi.
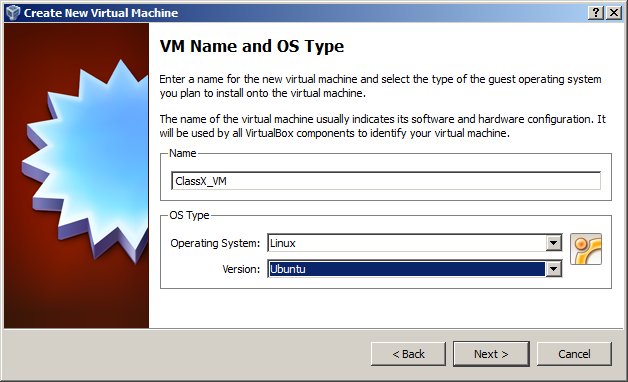
To create a new virtual machine, select Machine->New. Use “ClassX_VM” for the name of the virtual machine. Select Linux as the operating system, and Ubuntu as the operation system version.
Important: Select 1024 MB or more for base memory size when creating the virtual machine, as video transcoding requires much memory.
In “Virtual Hard Disk”, select “Use existing hard disk”, and select ClassX_Ubuntu_10.10.vdi.
Select Finish. You should see your VM ready.
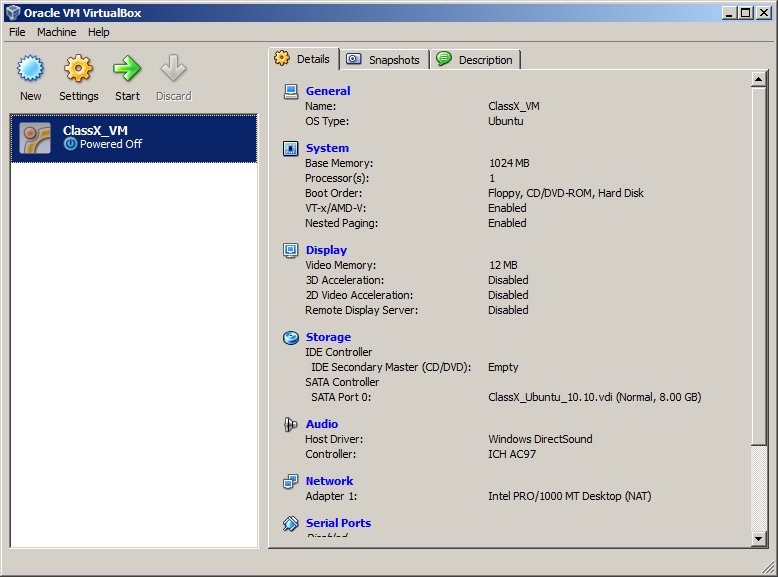
We need to set up port-forwarding so that the web-server running on ClassX_VM could communicate with the host computer and outside networks. Essentially, we configure VirtualBox to listen a particular port on the host computer (e.g., 8080), and forward all the packets arrive there to the virtual HTTP default port in ClassX_VM. The web-server running on ClassX_VM can then serve these requests.
To set up port-forwarding, run the following command on your host computer:
VBoxManage modifyvm “ClassX_VM” --natpf1 “guesthttp,tcp,,8080,,80”
With the above example, all TCP traffic arriving on port 8080 on any host interface will be forwarded to port 80 in the guest. The protocol name tcp is a mandatory attribute defining which protocol should be used for forwarding. The name guesthttp is purely descriptive and will be auto-generated if omitted. The number after --natpf denotes the virtual network card interface, and --natpf1 would work usually.
Note that VBoxManage can be found in the VirtualBox installation directory. E.g., in Windows 7, it could be in:
C:\Program Files\Oracle\VirtualBox\VBoxManage.exe
In Linux, VBoxManage should be in one of the system executable paths if VirtualBox was installed properly, e.g.,
/usr/bin/VBoxManage
Step 3: Generate ClassX content and start streaming
Now the virtual machine ClassX_VM is ready to launch and to serve content. In VirtualBox, start ClassX_VM by selecting “Start”. VirtualBox may show several notification windows, and you can just select “OK”. At ClassX_VM login, select user “ubuntu” and use default password “reverse”. Note that if you plan to have ClassX_VM accessible by outside computers, you should change the password after your first login.
We have created a Perl script to illustrate how to use the ClassX encoder and the ClassX slide synchronizer program. After ClassX_VM starts, select Applications->Accessories->Terminal to start a terminal console. Then change into Demo directory and run Demo.pl:
$ cd Demo
$ perl Demo.pl -in /home/ubuntu/Demo/Content/00068.mp4 -out /var/www/CourseVideos/Lecture01
-ipaddr 171.64.93.5 -slide /home/ubuntu/Demo/Content/duality1.pdf
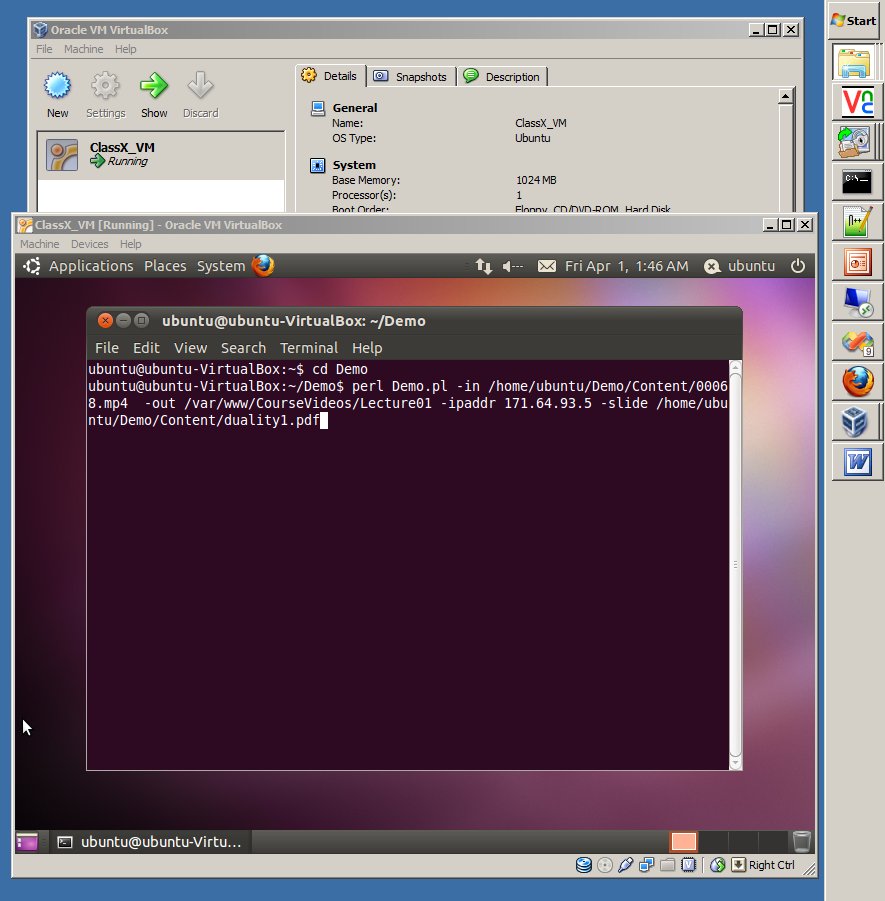
Demo.pl needs the following parameters:
Demo.pl -in <Input_video> -out <Output_folder> -ipaddr <IP_address> -slide <Slide_deck>
| <Input_video> |
Input video to be encoded. E.g., this could be the video file obtained from the camcorder. |
| <Output_folder> |
Folder to store the encoding and slide synchronization output. This is one of the web folders where Apache can serve the content directly, e.g., under “/var/www/” in ClassX_VM. |
| <IP_address> |
IP address of the host computer if you would like the ClassX content to be accessible by outside computers. You can find the IP address by commands ipconfig in Win7 and ifconfig in Linux. Alternatively, you can use localhost for <IP_address> if you only want to access the content on the same computer. |
| <Slide_deck> |
File with all the slides in PDF format. Slide synchronization will be skipped if “-slide <Slide_deck>” is omitted. |
After Demo.pl finishes, you can access the content with any web-browser using the URL:
http://<IP_address>:8080/Demo/Demo.php
E.g., with the above example, you can access the content with:
http://171.64.93.5:8080/Demo/Demo.php
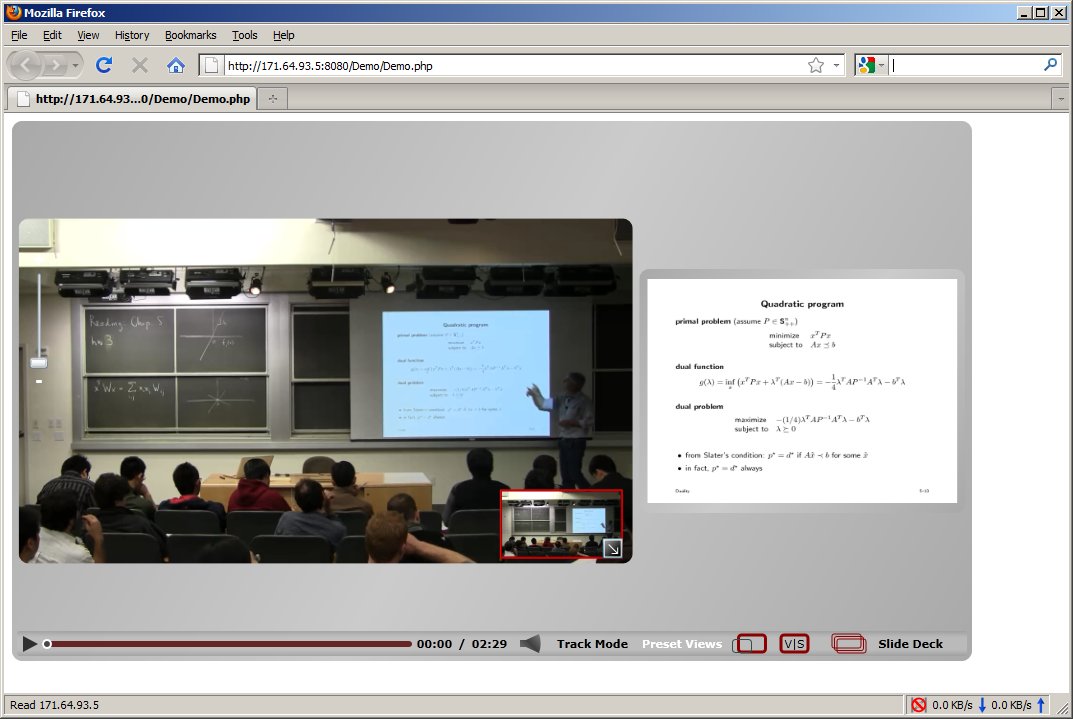
Note that Demo.pl has several configuration options. You can look into the code if you are interested.
And that's all. Enjoy ClassX!
Troubleshooting and performance tuning
It is important to verify that the network connection in ClassX_VM works properly. Try ping from ClassX_VM to an outside computer to confirm the connection is good.
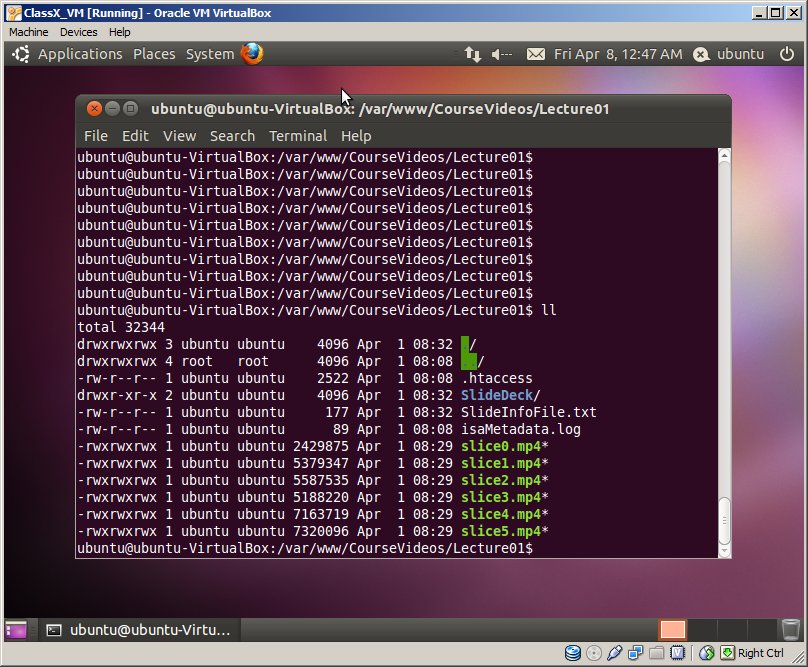
It is also important that Demo.pl runs till the end without any error, and <Output_folder> has all the proper output files. E.g., followings are the output when encoding the example video:
Try to allocate the same number of processors in your host to ClassX_VM. In VirtualBox, select Settings->System->Processor, and choose the same number of CPU as the host computer.
[Last updated April 03, 2011]